KITC920-resources
Rework video instructions
Reworking Logitech C920 camera is not difficult, but you should have right tools and some tinkering skills. After dissecting original camera, save 4 screws to reuse for securing PCB inside new case. For full instructions see video below.
Mounting a filter
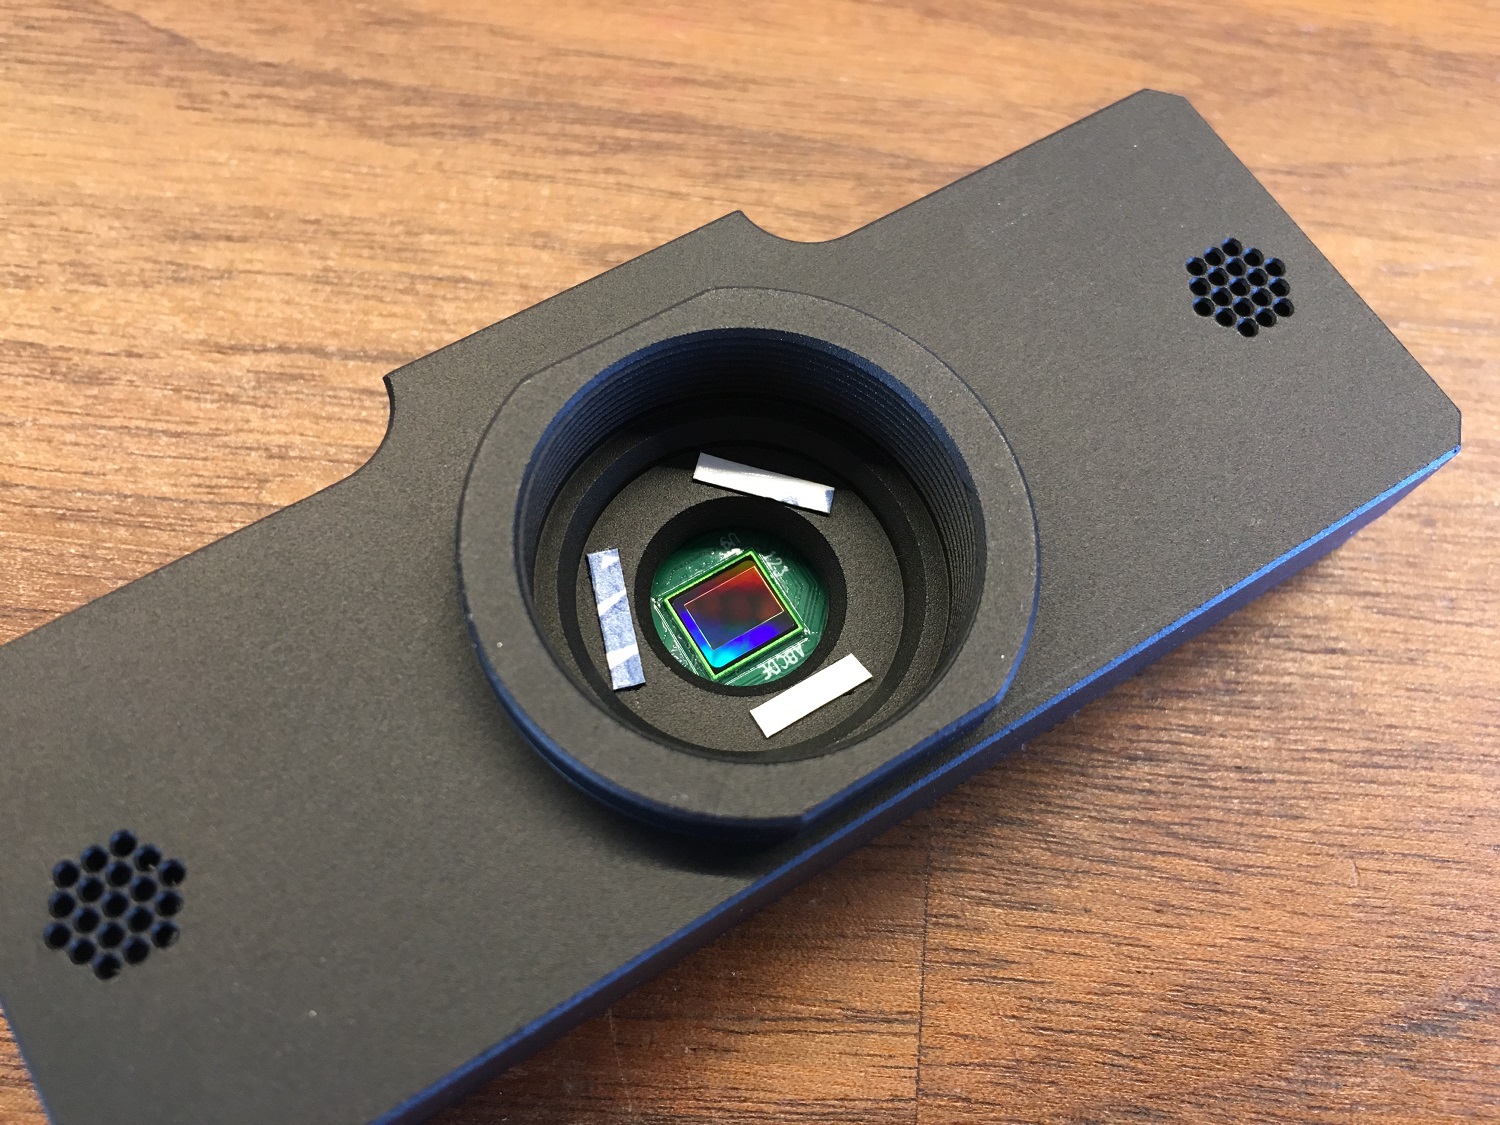
 Logitech C920 comes with IR low pass filter installed. Without this filter camera becomes sensitive to Infrared light. In order to maintain the same functionality you should install filter with same specifications. If you wish to use camera for night vision purposes, leave it as is – don’t install any filter. In some other cases you might want to see only Infrared light. In this case install another filter. To install filter stick few strips of double sided adhesive tape and drop filter inside.
Wiring
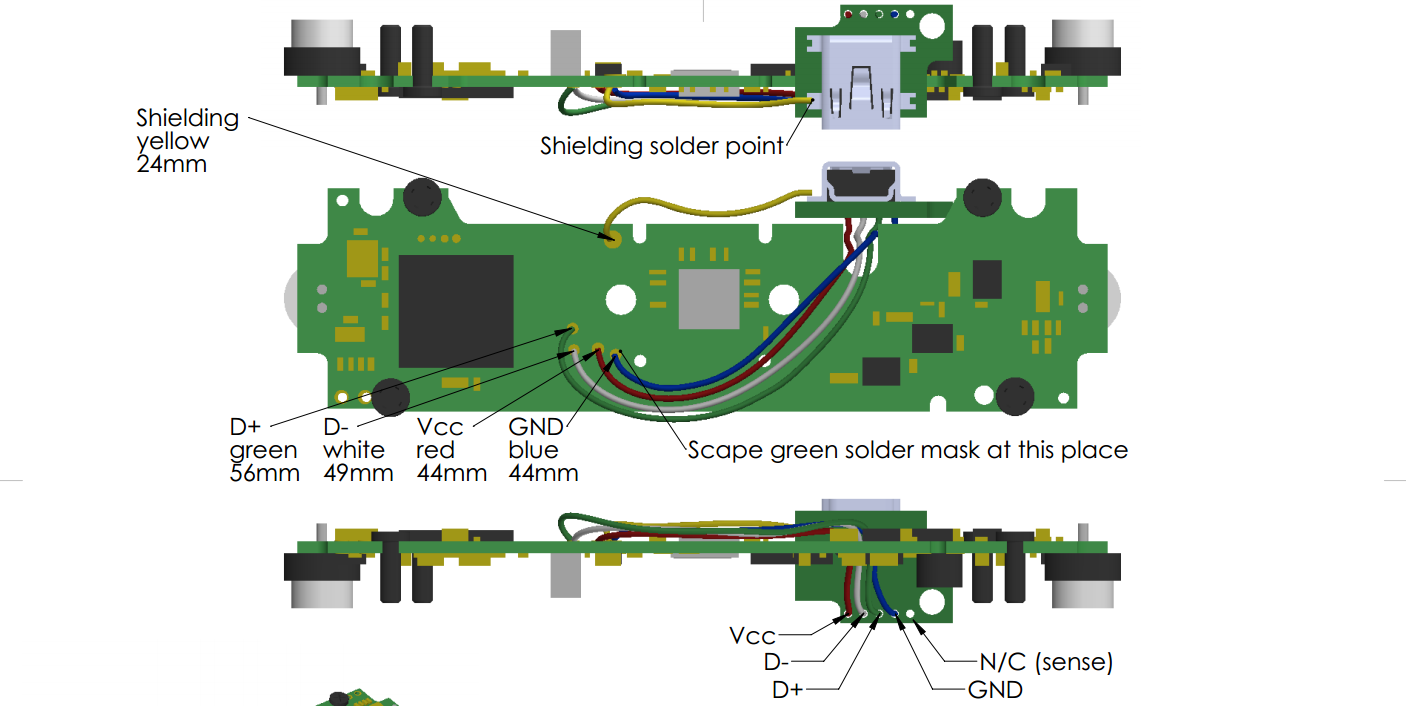 Route USB wires as indicated in this diagram. I found Kynar monolithic wires are the best – small and easy to solder. 5 wires will be used USB D+, D-, GND, Power. Shield also has to be soldered.
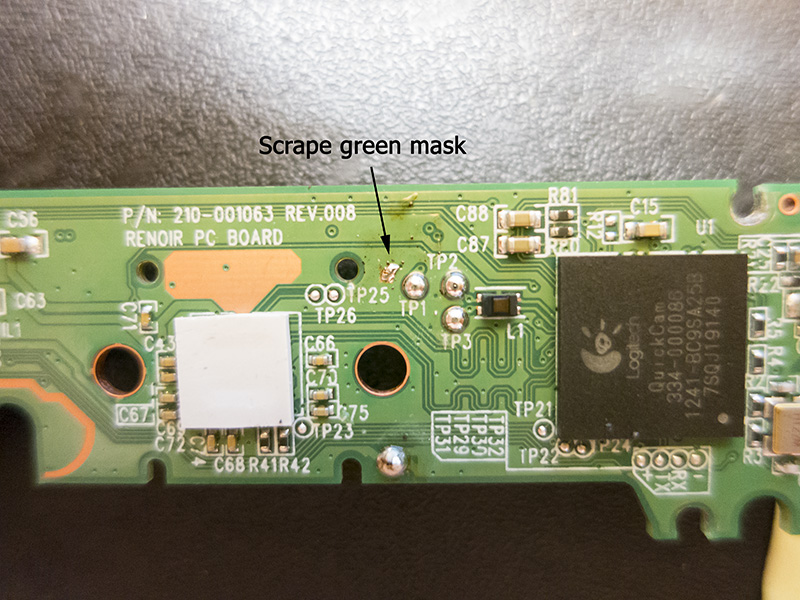 USB connector is available on the other side of PCB and it is surface mount type. Therefore it will be easier to use test pins. While GND is not available as test pin I recommend making pad by yourself. You can also use other places to solder GND wire, it is just my recommendation. Scrape green soldering mask with scalpel to access GND.
Dimensions and kit parts
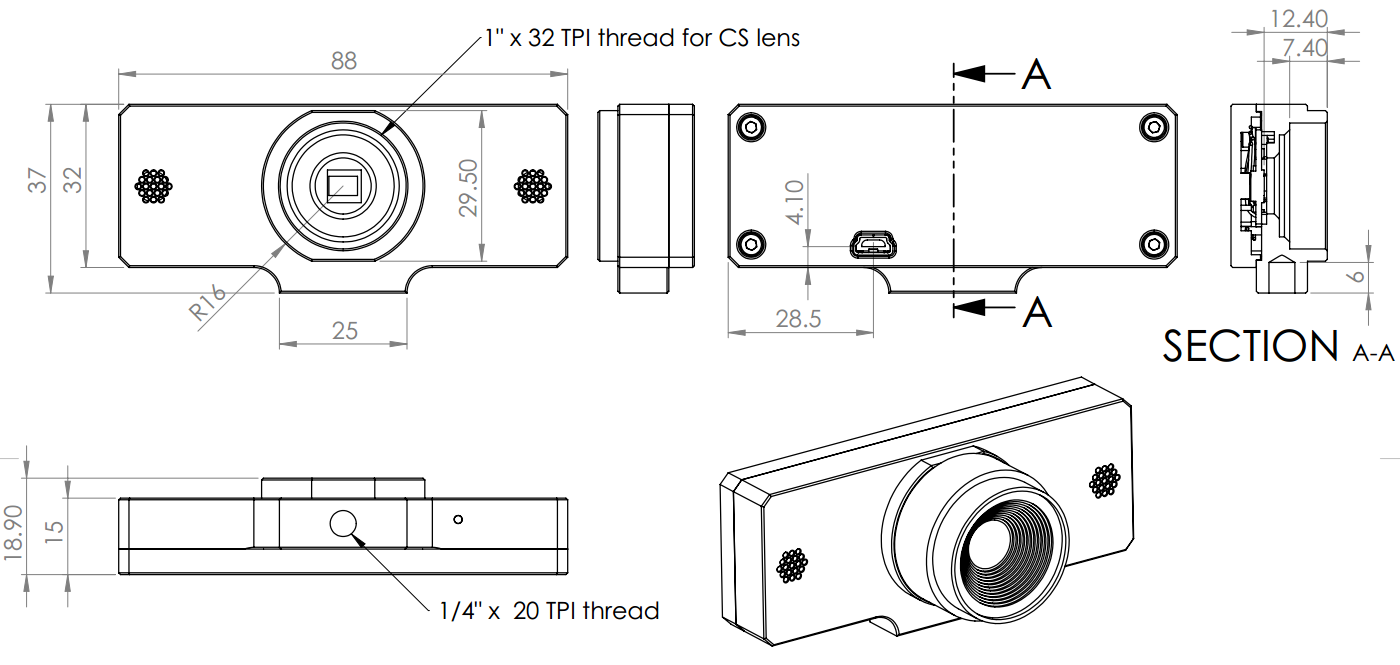 C920 rework kit dimensions comes as a kit. Main parts are 2 aluminum parts, when assembled dimensions are 88*37*18.9mm. Kit also includes allen 2x keys and 5 DIN 912 screws (1x M2x5, 4xM2.5×6). USB board with soldered connector also included.
Downloads
Notes
- For initial discussions, please take a look at lukse.lt blog.