Ethernet camera module build log #5 – Automated flashing
Developing firmware for an embedded device requires a lot of testing. Processors capable of running full-featured operating systems are much more complicated than smaller controllers (but obviously also are more flexible). Some tests can be done on the host machine, but in most cases (especially related to specific peripherals), it is best to run tests on actual hardware.
Let’s run quickly through some of the flashing methods.
NAND/NOR flash programming
External or internal flash chip programming is the preferred device program method. Some processors and microcontrollers offer security features to protect firmware so it would be locked away from access from unauthorized access. It is possible to order flash chips flashed with a bootloader or complete firmware image for large-scale production.
Bootloader
If a processor or microcontroller has a hardware bootloader, this is also an excellent method to upload the firmware. In some cases, the hardware bootloader is not enough, and software bootloaders are used, for example, u-boot. It’s not particularly complicated to configure u-boot to load a portion of the firmware from the TFTP server and automate the programming/testing procedure. However, special software or computer setup is needed in most cases. For example, in some other cases device connected to a computer via a USB port can register as a virtual disk, and it is enough to drag and drop new firmware via file manager.
SD card / USB flash disk swap
Physical swap SD card / USB disk is the safest and easiest way for initial flash transfer from the development computer to the device being tested. Also, it requires minimal knowledge from a customer. The main disadvantage – someone has to swap an SD card or USB disk and reset the board by hand.
Automated SD card swapper
Initially, I contemplated a robot carrying a physical SD card like in the movie Hackers, but there should be an easier way… and it turns out there is!
SDWire
Tizen was more innovative than the movie! They designed SD wapper with no moving parts and called it SDWire. Even better – this is an open source project, but can be purchased ready build.

It’s a micro SD card with a USB port. Once it is plugged into DUT (Device Under Test) SDWire role can be changed from the host computer.
- Mode1 – Virtual disk over USB port (host computer has full access to the SD card)
- Mode2 – SD card (DUT has full access)
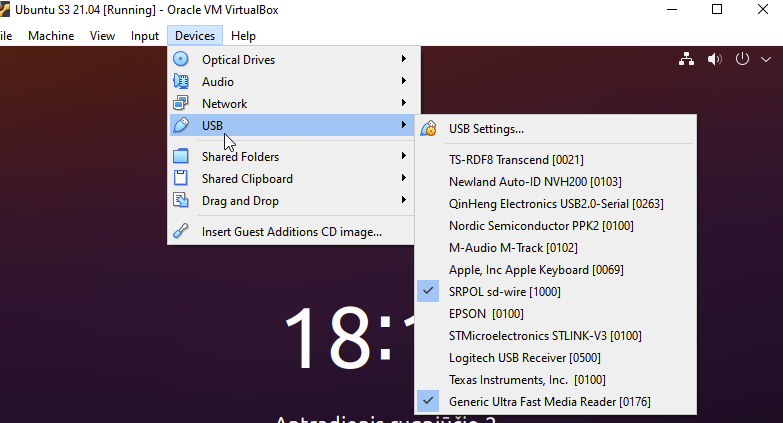
The host computer also has access to secondary control interface over the same USB port. Running it on the VirtualBox machine was straightforward. Just forward communication of sd-wire and Generic Ultra Fast Media Reader USB devices, and it should work.
Further installation is as easy as installing some dependencies and compiling software.
sudo apt install cmake libftdi1-dev libpopt-devCompile control software
git clone https://git.tizen.org/cgit/tools/testlab/sd-mux
cd sd-mux
cmake -S . -B build
cmake --build build
sudo cmake --install build
Command will switch SDWire into Mode1 (connect SD card to the host computer)
sudo sd-mux-ctrl --device-id=0 --tsThe second command will switch SDWire into Mode2 (connect SD card to the Device Under Test)
sudo sd-mux-ctrl --device-id=0 --dutOne thing I am missing from SDWire is DUT power control. Not complaining, though. This super simple project can be implemented on any microcontroller and ordinary relay in no time.